
Terraform Cheatsheet: AWS Load Balancers (ALB)

Welcome back to another technical deep dive by @BitSeByte. In Part 3 of our Terraform series, we are moving traffic management away from individual instances and onto a managed Application Load Balancer (ALB).
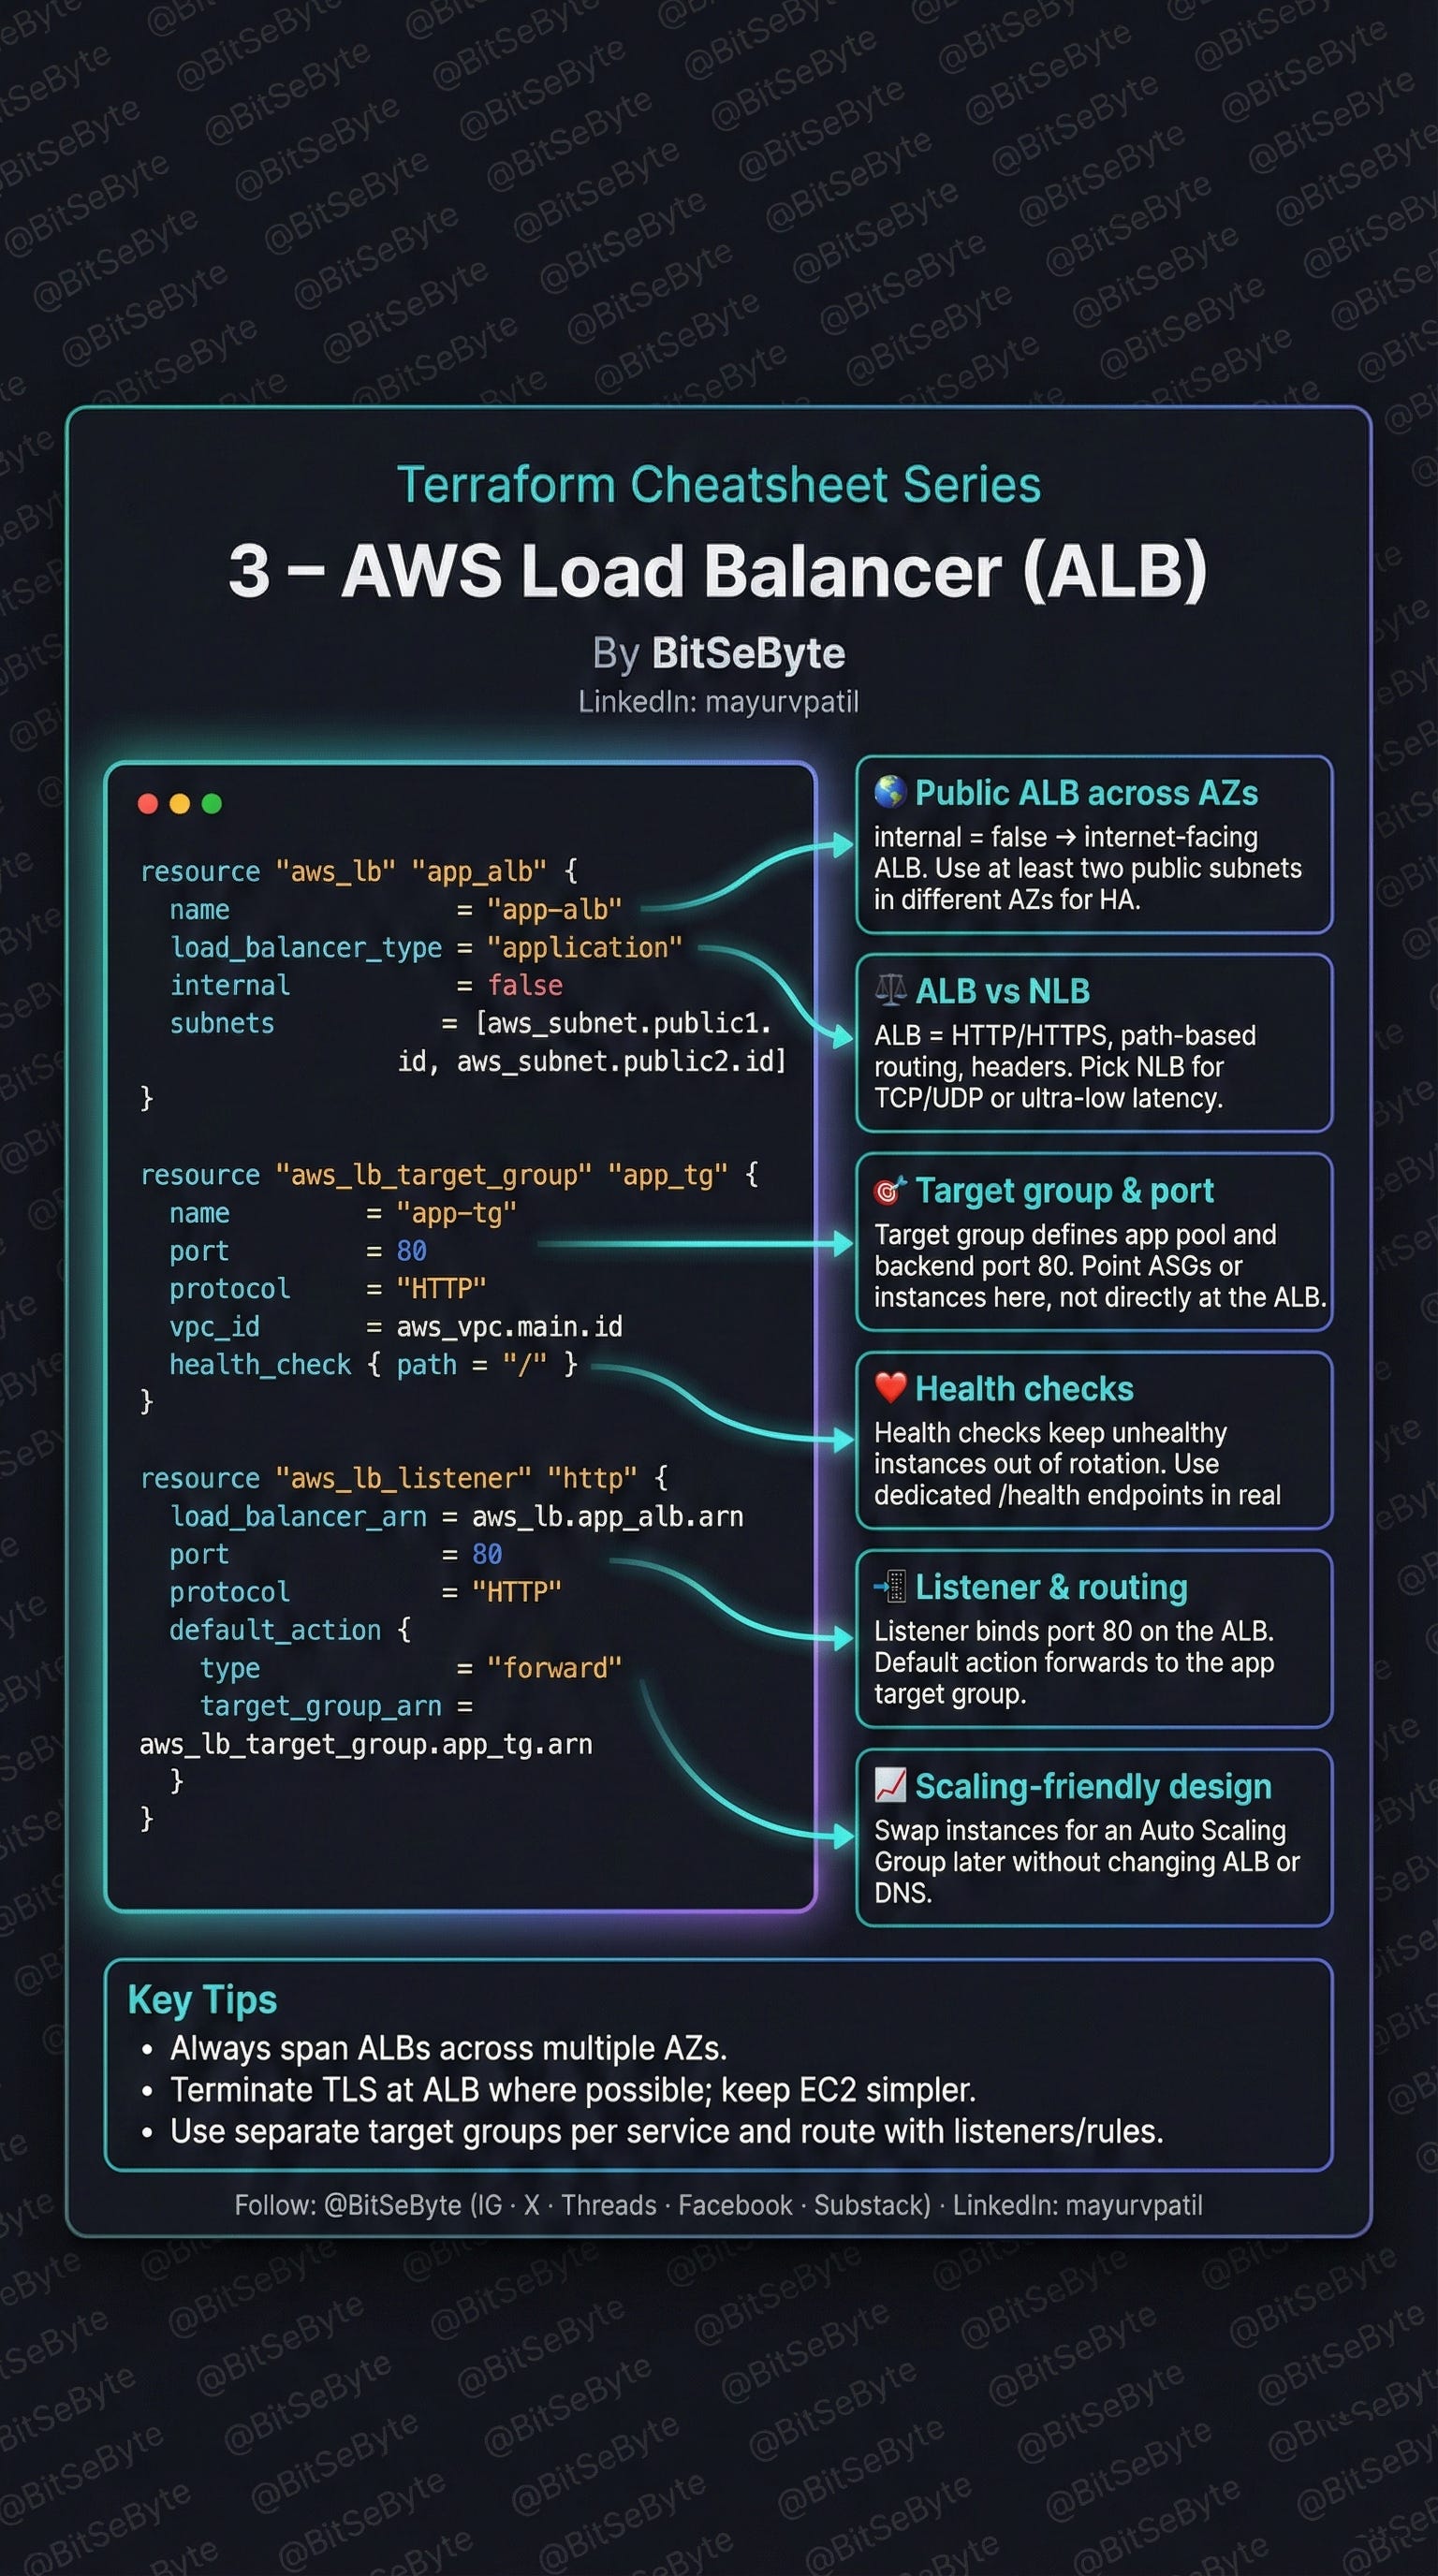
THE THREE PILLARS OF AN ALB
Defining an ALB in Terraform isn't just one resource block; it is a relationship between three key components:
1. The Load Balancer (`aws_lb`)
This represents the load balancer infrastructure itself.
- Scope: Set `internal = false` to create an internet-facing load balancer.
- Availability: You must specify `subnets` from at least two different Availability Zones. If one zone goes down, the ALB continues to route traffic in the other.
2. The Target Group (`aws_lb_target_group`)
This resource decouples the load balancer from the actual instances. Instead of pointing the ALB at "Server A," you point it at a "Target Group," and you register servers to that group.
- Health Checks: The `health_check` block is critical. It continuously pings a path (e.g., `/`) to ensure the instance is healthy. If the check fails, the ALB automatically stops sending traffic to that specific node.
3. Twhe Listener (`aws_lb_listener`)
This is the logic layer. It tells the ALB which ports to listen on (usually 80 or 443) and what to do with the traffic. The standard pattern is a `default_action` of type `forward`, which passes the request to your defined Target Group.
SCALING-FRIENDLY DESIGN
By using this pattern, you enable easy autoscaling later. You can swap individual EC2 instances in and out of the Target Group (via an Auto Scaling Group) without ever needing to update the Load Balancer's configuration or DNS records.
Keep this guide handy for your next infrastructure project!
Best,
The @BitSeByte Team